
News / October 22, 2026
How Are Rimless Glasses Made? Inside the Custom Process
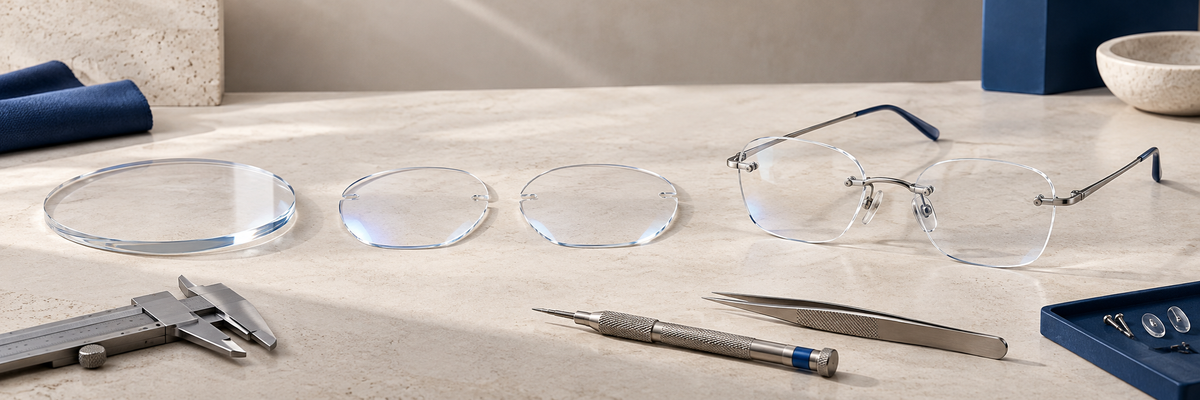
Rimless glasses are made by combining prepared optical lenses with bridge and temple hardware that mounts directly to the lenses. After the prescription or non-prescription lens details are confirmed, each lens is shaped to the chosen outline and size, mounting positions are laid out, the lenses are drilled or otherwise prepared for the selected mount, the hardware is fitted, and the finished pair is aligned and inspected.
The important customization point is simple: the frame design does not determine the lens shape. With rimless eyewear, you can choose the bridge-and-temple style separately from the lens shape, size and overall look, subject to prescription, lens-material and manufacturing suitability.
Main image: AI-generated conceptual illustration of rimless eyewear assembly. It is not a photograph of a Rimless Wear product, workshop or manufacturing process.
What makes rimless construction different?
A full-rim frame surrounds and supports the lens edge. Rimless glasses leave that edge exposed. The bridge connects the two lenses, while the outer mounting pieces connect the lenses to the temples. Because these components attach directly to the lenses, the lenses do double duty: they provide vision correction or sun protection and form the visible front of the glasses.
That construction is what makes customization especially flexible. A slim silver frame can be paired with a shallow rectangle, a soft oval or a taller geometric lens. The hardware may stay the same while the finished proportions change. Explore the current rimless frame styles, then compare the separate lens shapes and sizes.
How custom rimless glasses are made, step by step
1. The order details are reviewed
Before a lens is cut, the important inputs need to agree: frame choice, lens shape, intended size, prescription or plano selection, fitting measurements, lens type, material, coatings and any tint. These choices affect one another. For example, a prescription, a progressive design and a very shallow lens may need a suitability check before production.
For prescription eyewear, complete and accurate information matters more than any single style choice. An eye-care professional can help with an up-to-date prescription and fitting measurements; Rimless Wear can help with the available customization and ordering options.
2. The lenses are prepared for the order
Prescription lenses generally begin as round or oval semi-finished blanks. The required optical surfaces are produced for the prescription, then the lenses are polished, cleaned and prepared for requested treatments. Plano fashion or sunglass lenses follow the appropriate path for their selected material and finish.
The exact sequence is not identical for every material, coating or laboratory. Some finishing steps happen before drilling, while others may happen later. The goal is the same: preserve the optical design and surface quality while preparing the lens for its final shape and mount.
3. Each lens is edged to the chosen shape and size
An edging machine removes material from the lens blank until it matches the intended outline. In rimless eyewear, there is no full frame rim hiding the perimeter, so the exposed lens edge becomes part of the finished design. Shape, width, height and edge finish all influence the visual result.
Rimless Wear lets customers choose a lens shape separately from the frame and adjust sizing during customization. Its lens-size guide explains how lens width and height relate to the selected dimensions. If the standard library does not contain the idea you want, the custom lens-shape guide explains how a drawing, digital design, sketch or reference photo can become a draft for approval.
4. The mounting positions are laid out
The positions for the bridge and outer mounting hardware must be transferred accurately to the prepared lenses. This layout has to respect the lens orientation, the intended alignment of the finished glasses and the location of the optical design. For custom shapes, it also has to make visual sense with the contours you selected.
This is why the process is more than cutting two attractive outlines. The left and right lenses must work as a balanced pair, and the mounting geometry must suit the chosen hardware.
5. The lenses are drilled and the edges are finished
For a drilled rimless mount, precise holes or slots are prepared where the bridge and temple-side hardware will attach. Equipment, drill geometry, speed and finishing technique vary with the lens material and mounting system. The goal is a clean mounting area without unwanted stress or damage.
Because rimless lens edges remain visible, the selected edge treatment also matters. A polished edge can look glossier and catch more light; a non-polished edge is more understated. Read the polished versus non-polished lens-edge guide before choosing.
6. The bridge and temples are mounted
The bridge is attached at the inner mounting points and the temple hardware at the outer points. Depending on the design, the mount may use screws, bushings or another compatible fastening system. The technician controls tension carefully: hardware needs to be secure without placing unnecessary stress on the lens.
7. The completed glasses are aligned and inspected
Final checks can include lens orientation, prescription verification where applicable, bridge and temple alignment, hardware security, surface condition, cleanliness and the absence of excess mounting stress. The glasses are adjusted as a complete system rather than as two lenses plus unrelated parts.
Which parts do you choose—and which parts does the workshop control?
| Customer choices | Production controls |
|---|---|
| Frame hardware style and available color | Accurate component and order matching |
| Lens shape, width and height | Edging the pair to the approved dimensions |
| Prescription or non-prescription lens type | Optical surfacing, orientation and verification |
| Compatible material, coating, tint or finish | Material-appropriate processing sequence |
| Polished or non-polished edge, when available | Clean drilling, mounting, alignment and inspection |
Availability and compatibility can vary with the exact combination. Check the live options in the Rimless Wear FAQ and during customization rather than assuming every feature works with every prescription or shape.
What should you double-check before ordering?
- Your prescription and PD: use complete, current information for prescription eyewear.
- Your intended frame width: compare it with a comfortable pair you already own.
- Lens height: make sure the proportions support your style and the selected lens design.
- Shape approval: for a submitted custom shape, review curves, corners and dimensions—not just the overall idea.
- Lens options: confirm material, tint and coating compatibility in the current configurator.
If you are still comparing proportions, start with the lens shape and size guide. It explains how to separate aesthetic preference from practical fit.
Frequently asked questions
Are rimless lenses cut before or after they receive the prescription?
For prescription orders, the required optical surfaces are prepared as part of lens production, and the lens is then edged to the final outline. The exact order of coating, tinting, edging and drilling can vary with the material and laboratory process.
Can I choose any lens shape for any rimless frame?
The frame hardware does not dictate one fixed lens outline, so rimless glasses allow substantial shape freedom. However, the requested design still needs to be suitable for the prescription, lens material, dimensions and mounting positions.
Why do rimless glasses need holes in the lenses?
In a drilled rimless design, the bridge and temple-side components attach directly through prepared mounting points in the lenses. There is no surrounding eyewire to hold the lenses.
Can the same frame look different with another lens shape?
Yes. Keeping the same bridge and temples while changing the lens outline or dimensions can noticeably change the finished style. That separation is one of the central benefits of custom rimless eyewear.
Is a generated image on this page an actual product example?
No. The main image is a conceptual illustration created to explain the idea of lens preparation and assembly. Use live product and customization pages for current choices.
Start with the choices that shape the result
A well-planned rimless order begins before the first lens is cut. Choose the hardware you like, decide on a lens outline and dimensions, provide the required prescription and fitting details, and confirm compatible finishes. The workshop then turns those decisions into a matched, mounted and inspected pair.
Browse rimless frames and begin your custom order.